


Schädlings-Frei-Organic
€16,95
For spraying or watering, depending on the authorised use. The method depends on the plant, pest and location.
View product in our shop →

Is the root ball crowded, difficult to moisten or sitting in compost that has lost its structure? Assess the actual need and plan routine repotting towards the start of growth. This guide is for already rooted plants. Unrooted cuttings and plants with rot or freshly cut roots need a separate approach.
Choose a stable container with room for the existing root ball and some fresh compost. Shape and depth depend on the roots; a shallow bowl does not automatically suit every plumeria or desert rose. Have compost, a work surface and gloves ready. The old root ball remains part of the pot contents: the whole container volume is not needed as new compost.
Check drainage holes and clear any blockage. A planting pot inside a closed decorative container needs its own open outlet. A coarse layer does not replace drainage holes and is not essential in every container. Water must be able to leave the pot.
Release the old container by gently pressing or tapping it and support the root ball. Do not pull on tender branches, leaves or flowers. Preserve healthy roots and remove only loose old compost. If you find soft, dark or rotten areas, investigate the cause instead of potting the unchanged ball into wet compost.
Add some compost and place the ball on it. Its previous surface should sit below the container rim with space left for watering. Do not bury the stem base more deeply. Keep an already exposed adenium caudex uncovered; deliberately exposing or styling roots is not a required part of repotting.
Add compost around the ball in small portions. Hold the plant in position and close larger gaps with gentle pressure. Do not compact the mix hard. Check stability, planting depth and watering space before moving the container to its position.
For an actively growing plant with an undamaged root ball, water cautiously according to moisture need and let excess water drain. A resting plant, an already moist ball or injured roots requires a different approach. Do not immediately saturate every newly repotted succulent; establish suitable aftercare first where roots are damaged.
Provide the bright, warm position appropriate to the species and gradually adjust it to stronger sunlight after a move. Check both the old ball and new compost before watering again. Record the repotting date. The label specifies supplementary feeding after about four weeks; account for actual growth and nutrients already present. The frangipani plant profile helps with subsequent Plumeria care.
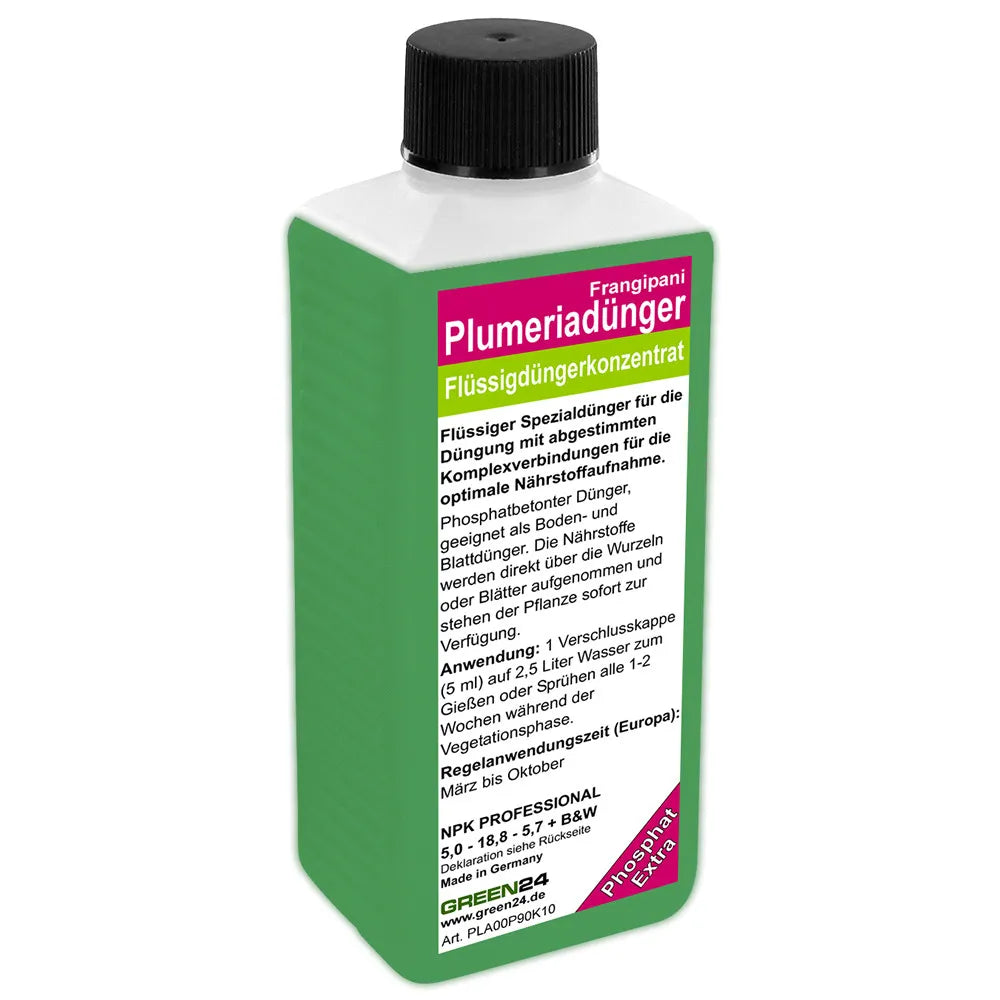
Add one capful (5 ml) to 2.5 l of water for watering or spraying.
Every 1–2 weeks during the growing season.
Label application period: March–October; follow the plant's growing season.
| Water | Standard 100 % | Young plants 50 % | Seedlings with leaves 20 % |
|---|---|---|---|
| 1 l | 2 ml | 1 ml | 0.4 ml |
| 5 l | 10 ml | 5 ml | 2 ml |
| 10 l | 20 ml | 10 ml | 4 ml |
Shake the concentrate before use.
Pour the required amount of water into a suitable container.
Use standard 100%, young plants 50%, or seedlings with leaves 20% of the basic dilution. Concentration does not determine the watering volume needed.
Measure the calculated amount accurately with a suitable measuring aid.
Add the concentrate to the water and mix evenly.
Feed the already moist root ball when nutrients are needed; do not overwater using a rigid water volume.
Do not mix the entire bottle into the bag. The compost is ready to use; dilute the concentrate separately with water.
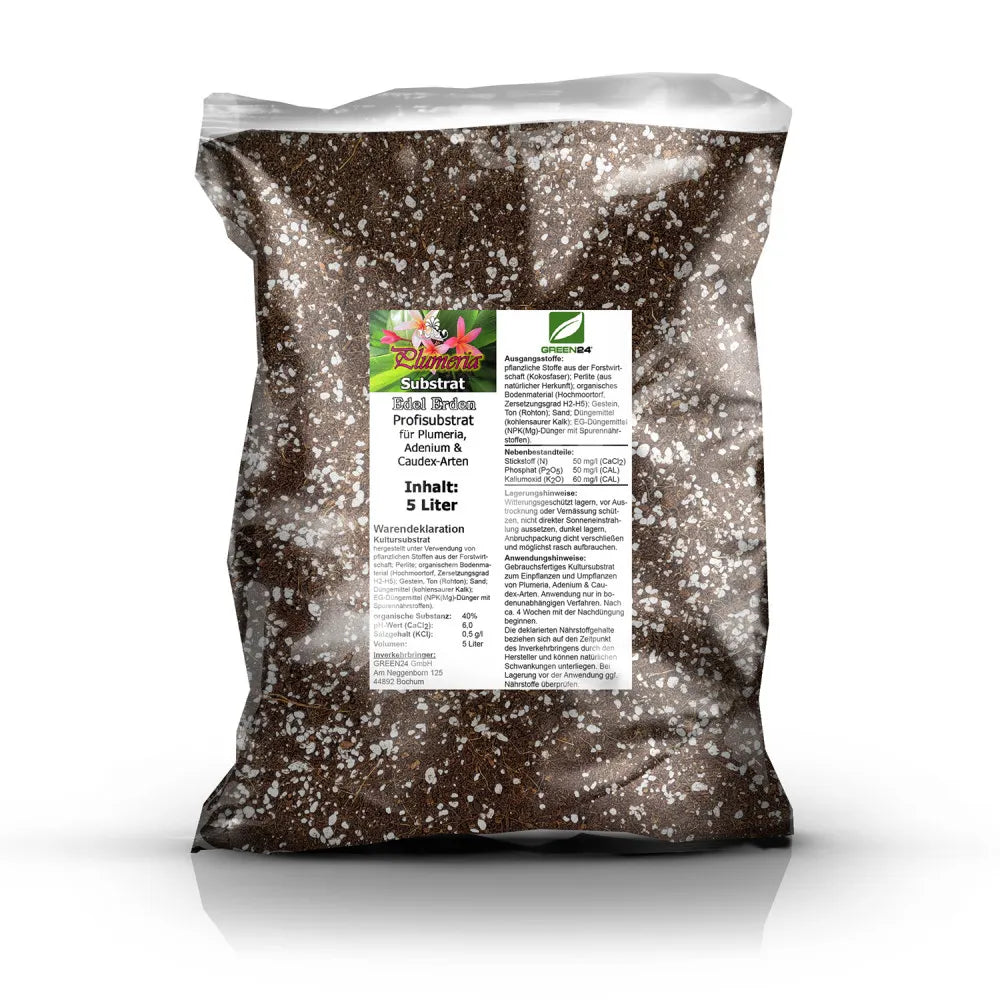
Plumeria Repotting Set: choose 5 or 10 litres of ready-to-use compost, each with one 250 ml bottle of Frangipani fertiliser. The selected option determines the compost volume; formulation and fertiliser dilution are the same in both sets.
The product label specifies starting supplementary feeding after about four weeks. Account for actual growth and nutrients already present. A resting plant is not fed simply because that time has elapsed.
NPK 5 + 18.8 + 5.7
Declared nutrient percentages. Product pH: 6.2.
Coir, peat and mineral ingredients.
Declared inputs are coir, perlite of natural origin, raised-bog peat H2–H5, rock, clay (raw clay), sand, calcium carbonate and NPK(Mg) fertiliser with trace nutrients.
The compost is ready to use and already contains nutrients. In a container, its moisture conditions also depend on pot shape, roots and actual watering. A growing-medium mix alone cannot prevent waterlogging.
Organic matter, pH, salt content and available nutrients.
Both original bag sizes declare these values. Nutrient figures refer to the time the manufacturer places the product on the market and may fluctuate naturally. After storage, check before use where necessary.
Plant and container are not included.
Plant profile and care calendar
This set is intended for rooted Plumeria plants. Unrooted cuttings need separate rooting instructions. Adapt watering during leaf loss and dormancy, and do not feed by the calendar.
For Plumeria, Adenium and caudex plants in containers.
The label names planting and repotting Plumeria, Adenium and caudex plants. Use is limited to soil-independent systems, such as growing in containers. Species, root condition and season determine subsequent care.
The product label specifies starting supplementary feeding after about four weeks. Account for actual growth and nutrients already present. A resting plant is not fed simply because that time has elapsed.
Dry · dark · above 8 °C to a maximum of 38 °C
Store in a dry, dark place above 8 °C and at no more than 38 °C.
Avoid eye contact and minimise dust when pouring. Store away from food and animal feed and out of reach of children and pets.
Protect your skin from milky sap when handling Plumeria and Adenium and wear gloves. Clean your hands afterwards.
Dark and sheltered from the weather; seal opened bags.
Store sheltered from the weather and in the dark. Protect against drying out or becoming waterlogged and keep out of direct sunlight.
Seal opened bags tightly and use them promptly. After storage, check nutrient levels before use where necessary.
Depending on the selected option, one 5- or 10-litre bag of compost; both sets contain one 250 ml bottle of fertiliser. Plant and container are not included.
The product label specifies starting supplementary feeding after about four weeks. Account for actual growth and nutrients already present. A resting plant is not fed simply because that time has elapsed.
5 ml per 2.5 litres of water. The table shows standard, young-plant and leafy-seedling strengths.
At standard dilution, approximately 125 litres of feed solution. Match watering volume to the plant.
No. Use the ready-to-use compost and dilute the concentrate separately with water for later feeding.
No. Both contain the same 250 ml fertiliser: 5 ml per 2.5 litres of water at standard strength, making approximately 125 litres of feed solution per bottle. Do not mix the entire bottle into the compost.

Plumeria Repotting Set: choose 5 or 10 litres of ready-to-use compost, each with one 250 ml bottle of Frangipani fertiliser. The selected option determines the compost volume; formulation and fertiliser dilution are the same in both sets.
The product label specifies starting supplementary feeding after about four weeks. Account for actual growth and nutrients already present. A resting plant is not fed simply because that time has elapsed.
5 ml per 2.5 litres of water. Account for the initial nutrients in the compost.
The plant species, photographs and details of location, moisture and previous care help assess plant damage. Identify the cause and a suitable application before treatment.
More fertiliser is not a general solution to growing problems. A recommendation to buy products together does not confirm that they can be mixed.
General manufacturer information: these products have not been selected here as suitable treatments for the plant shown here. Before use, check the plant species, pest, application site and current instructions.


Use plant protection products safely. Always read the label and product information before use.
Selected additions for your plant care.

Buy the included fertiliser separately.

Buy the included compost separately.

